


So gay for canelé
On Asian excellence in Parisian food culture and claiming your queer right to making a finicky French pastry.
It’s pretty and all but I never truly enjoyed Paris until I had someone to talk about Paris with. The kind of mid-stroll blabbing that takes you from one arrondissement to the next before you realize you’ve walked half the town already.
I’ll coo about every chic old lady we pass while they comment on a cute cornice spotted overhead. Dusting off the crumbs from our nth pastry of the day, both of us will act surprised that we’ve arrived at a topic worlds away. We’ll be deep into dream analysis, perhaps, or frolic through the shallowest points of pop culture. Like two Julie Delpys from the Before trilogy if they stopped to snack more.

Before Mr. Mafalda, Paris to me was a bunch of Michelin stars and standbys to be checked off like a grocery list. Now, I leave a little room on my rigorously assembled Google Doc itinerary for one other thing: an element of surprise.
Wandering through the Marais a couple trips back, Mr. Mafalda and I chanced upon what would be our most memorable pain de mie in the city. Not from a traditional boulangerie but from a Japanese bakery called Carré. Perfectly square and golden, the loaves peeked from cooling racks like the safety deposit boxes in a bank vault. Another version flaunted a round crystalline top that resembled the cuts on a diamond. To leave Carré empty-handed would have been criminal. We took one of each home.
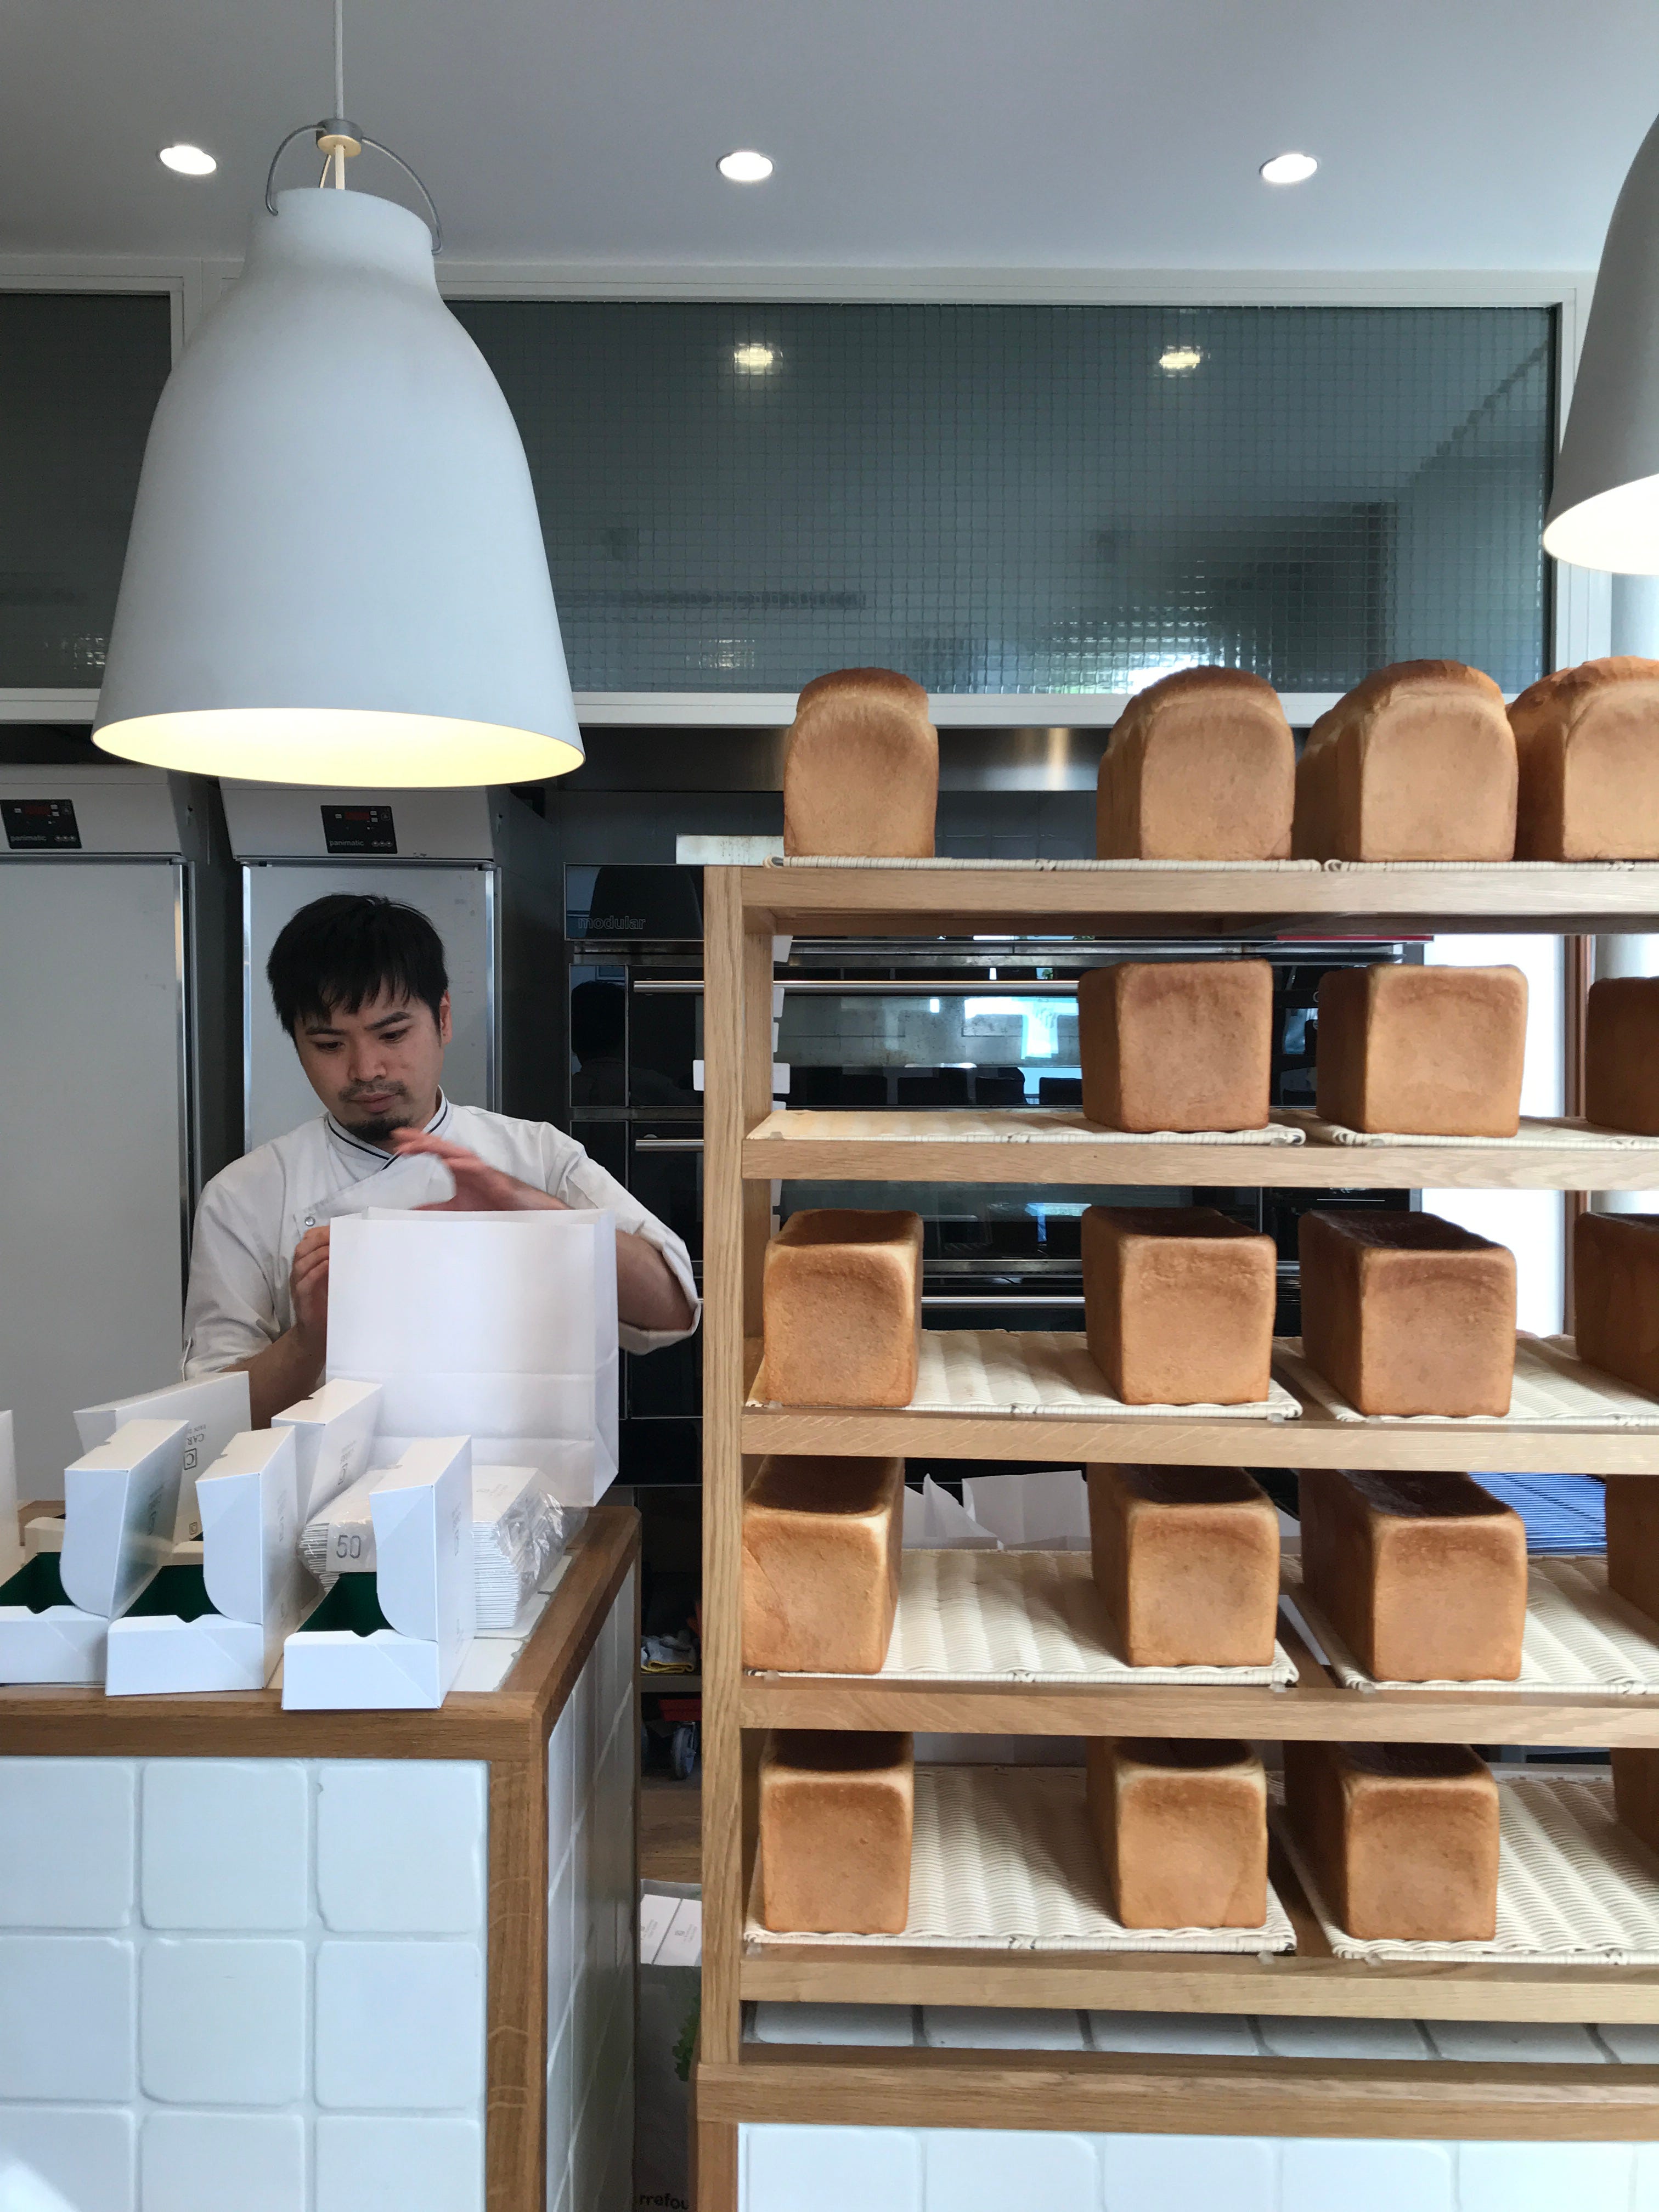
Sliced thick and enjoyed as breakfast for an entire week, the loaves offered toast as crusty as a baguette and as airy as a fritter. Each salty, buttery bite packed as much bliss as popping bubble wrap.
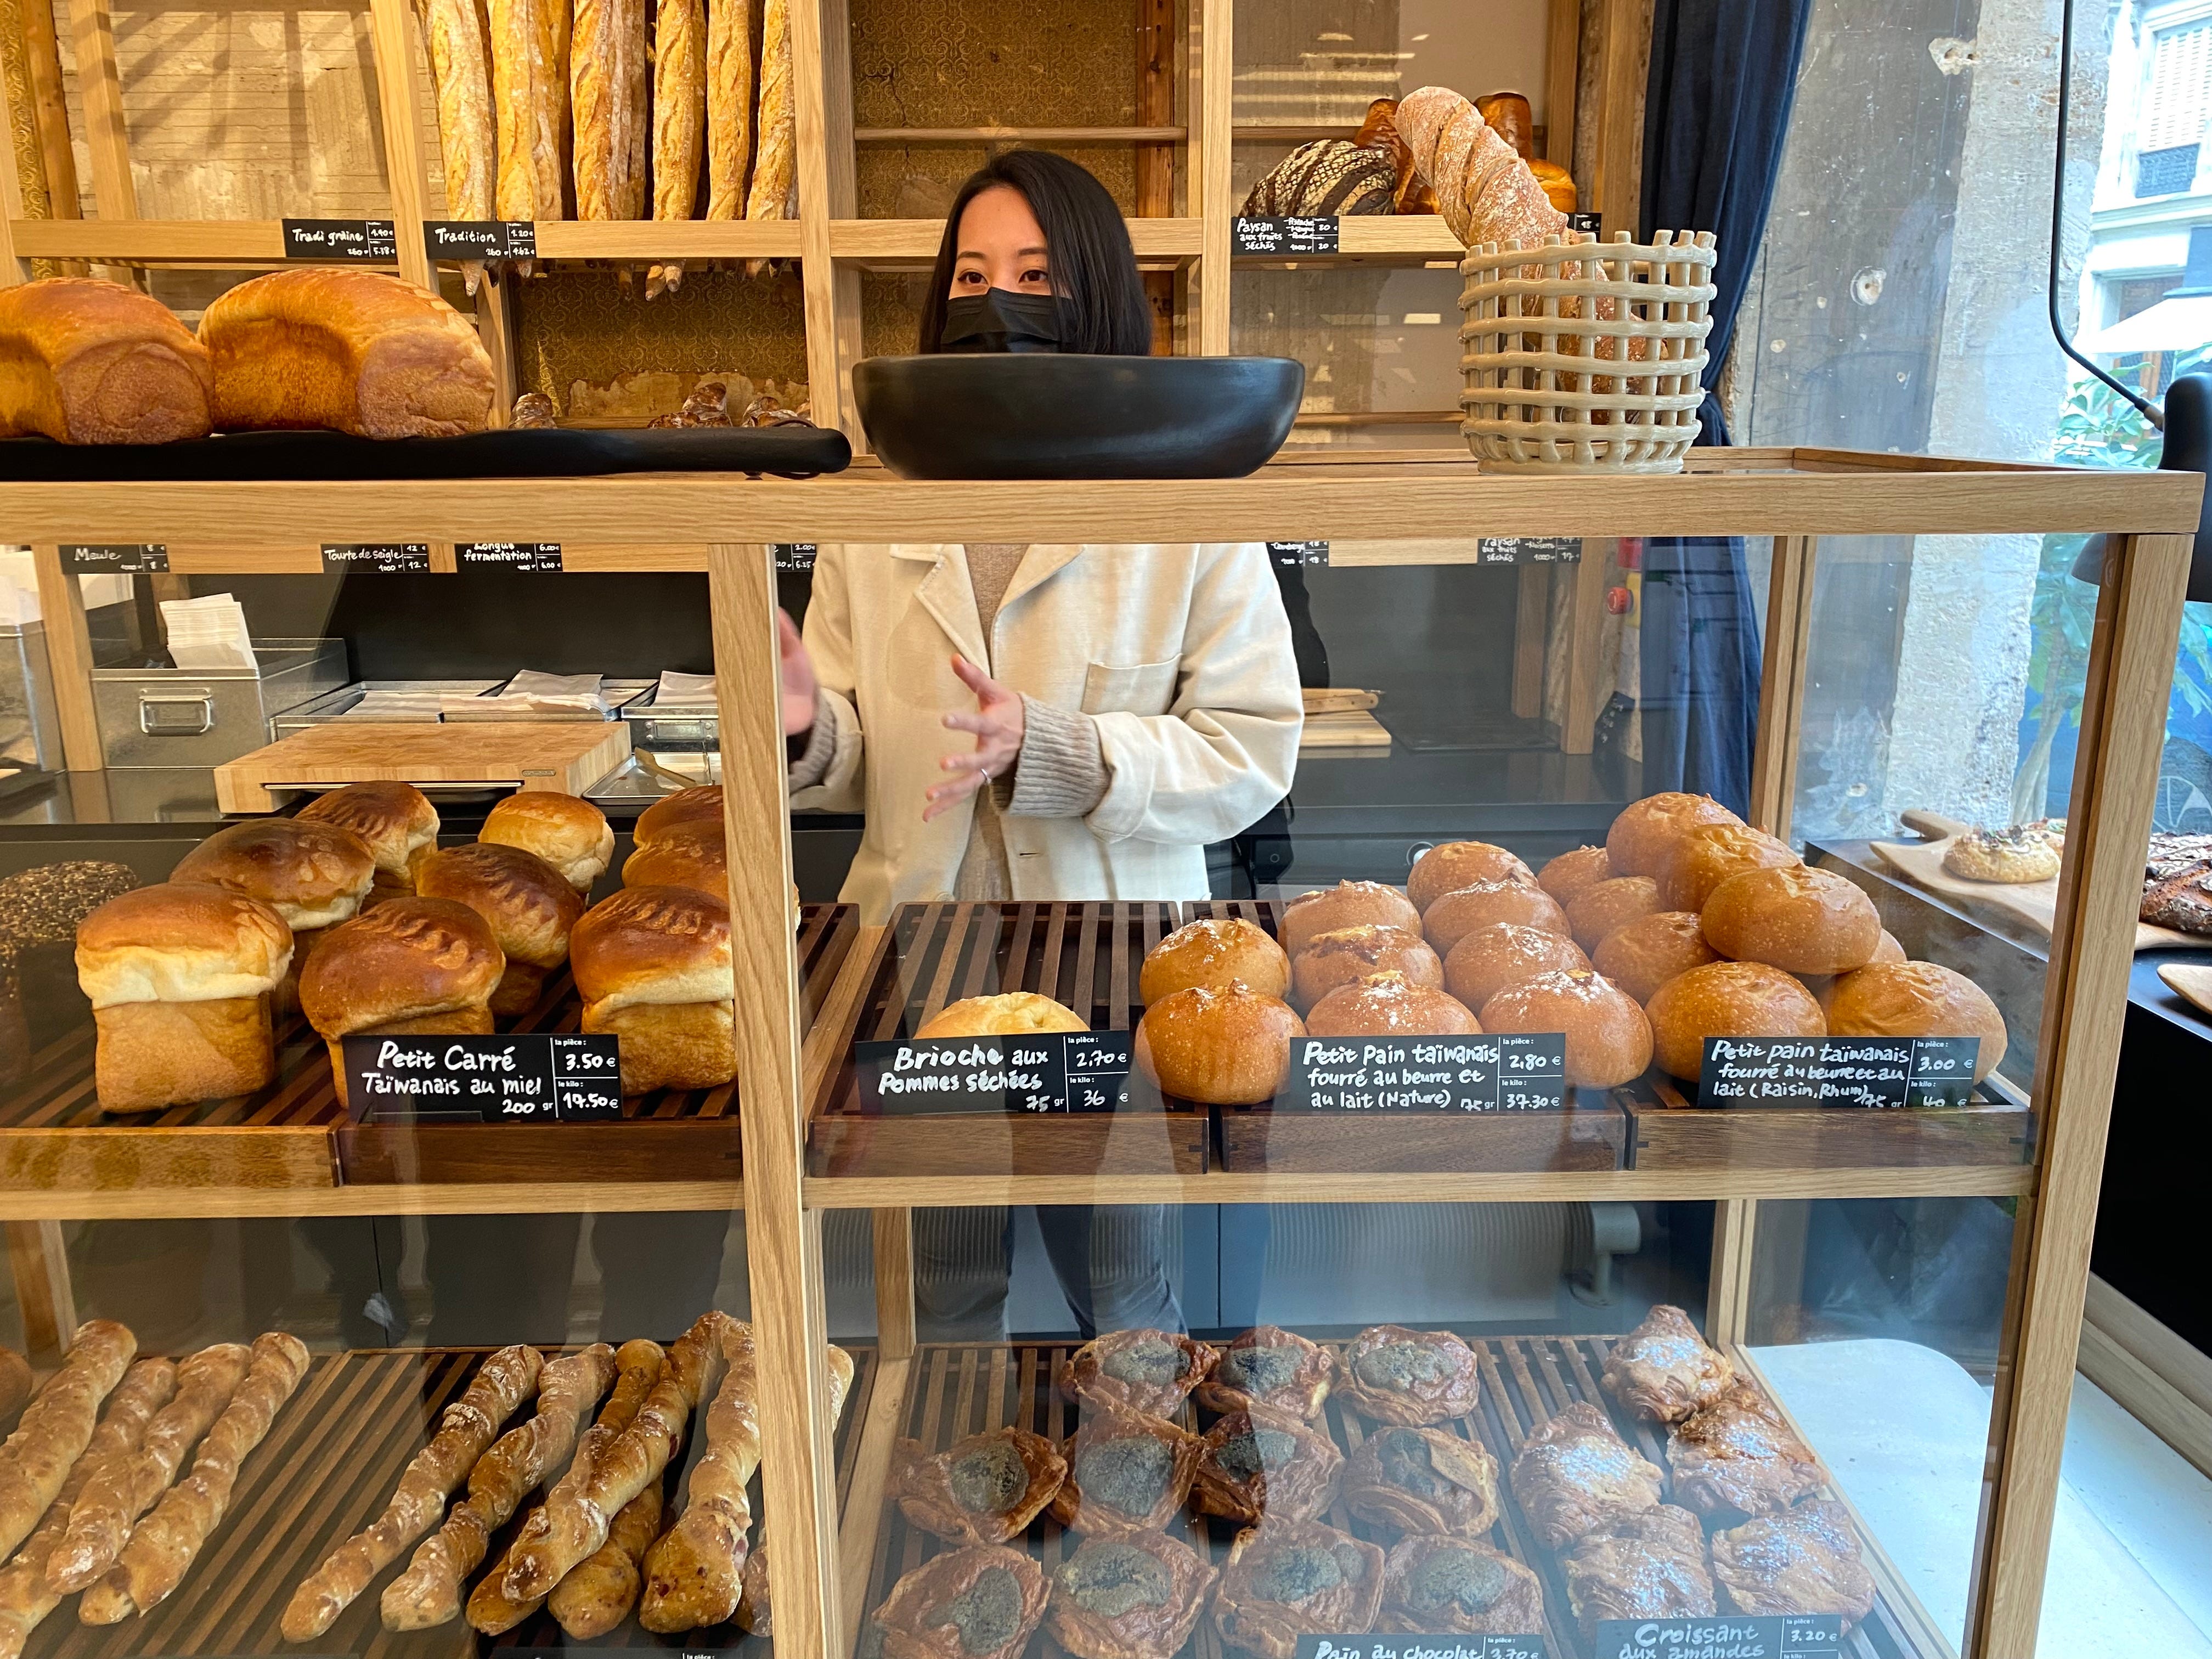
I could keep coming back to Carré if Mr. Mafalda wasn’t so intent on showing me the wonders of deviation. When we returned to Paris in April, he tugged me to Rue de Vielle du Temple, about a 10-minute walk from the bakery. Known more for its sneaker shops and French menswear labels, the street now had a just-opened Taiwanese bakery called Petite Île Boulangerie, featuring honeyed buns and fruit-studded boules. For mornings when a regular ol’ croissant just won’t cut it, we stocked up on rum-raisin sweet buns and pain au chocolat topped with black sesame paste.
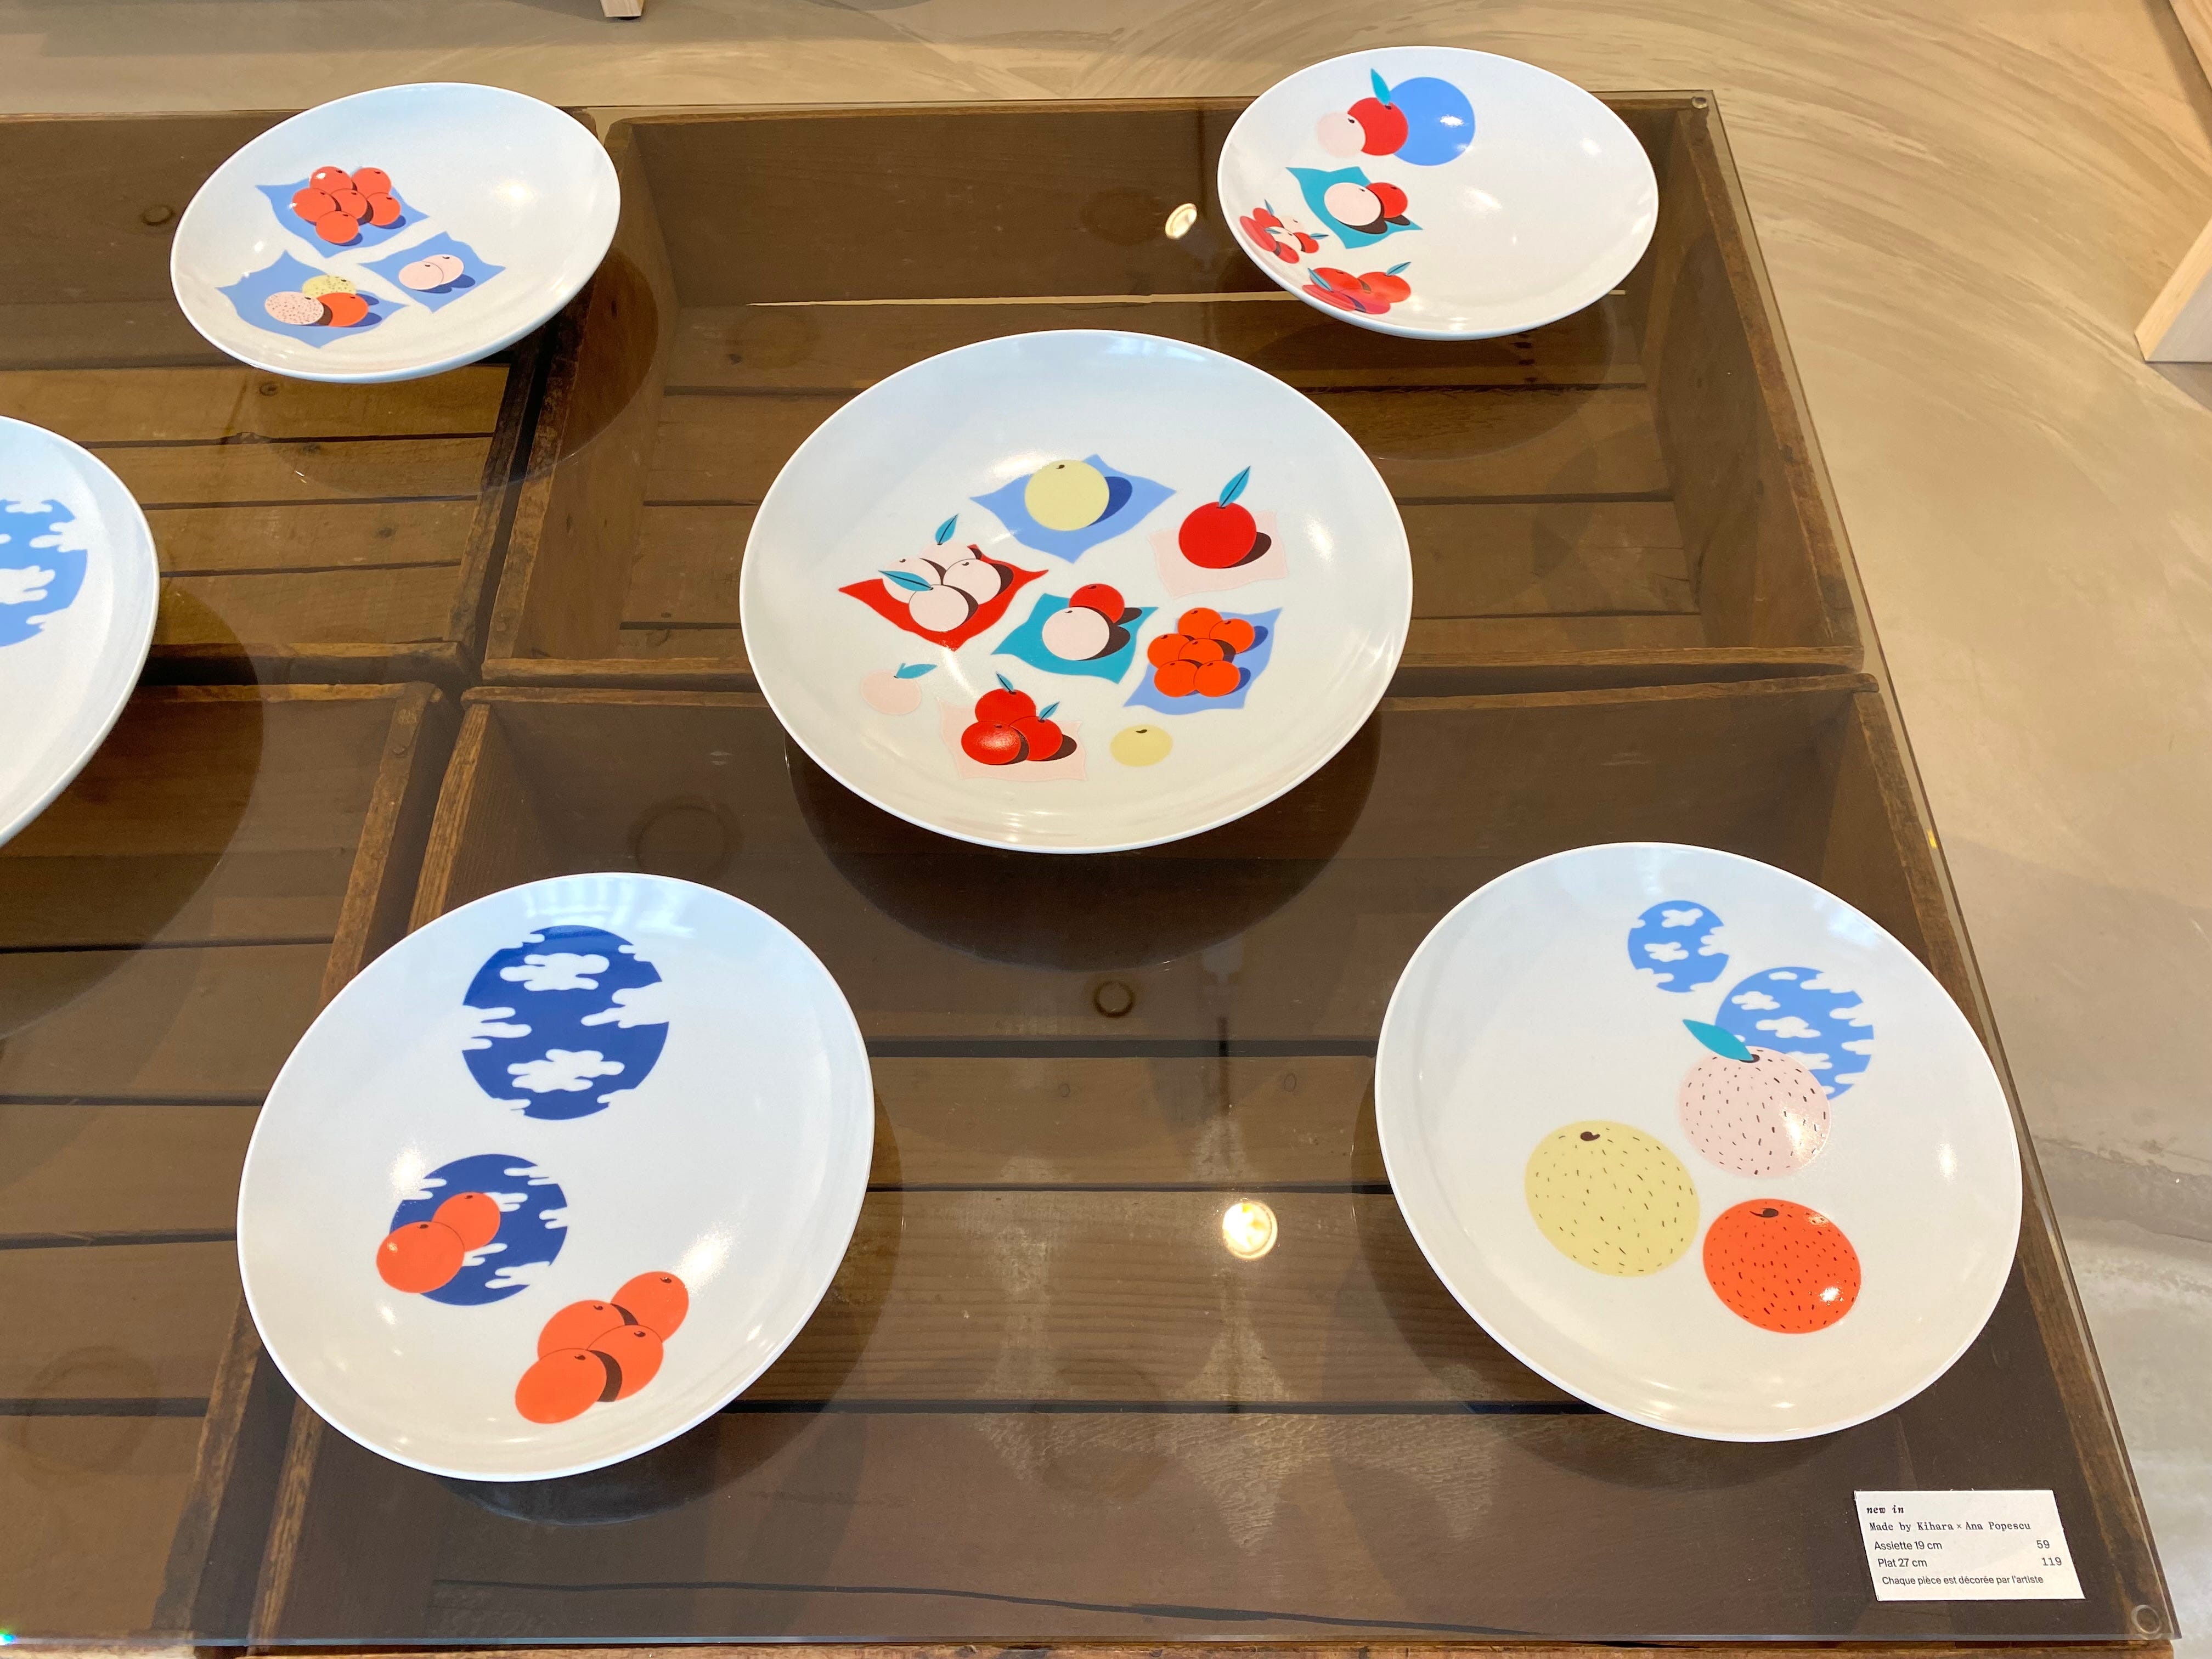
Down the street from the bakery was Made by Kihara, a boutique filled with Japanese ceramics featuring spunky graphics by French designers. The shopkeeper got giddy telling us about how the porcelain was produced in Arita before walking us through a series of bright fruit themes emblazoned on plates, like Heartstopper doodles with a Call Me By Your Name sensibility.

Seeing East Asian energy penetrate Paris this way, you get a sense of the city’s growing ease as it converses with different cultures. It’s thrilling considering 10 years ago, cocktail-slinging Asian tapas bars like Le Mary Celeste felt like an anomaly in a food scene so anal about tradition. Back then, its chef, Haan Palcu-Chang was surprised at the demand for kimchi when he served it as a bar snack. “French people aren’t used to things being spicy,” he’d told me in an interview. “But they are getting better.”
Who knows what’s around the corner when it comes to Paris’s cravings? If one of the hardest reservations to land is at Mokonuts, a restaurant beloved for the global cooking of its Lebanese-Japanese owners, maybe even Filipino food can have a piece of that prom queen crown, Cady Heron-style, and rule alongside other foreign cuisines.
With Chef Erica Paredes opening Reyna last month, that’s become even more of a possibility. In the 11th, just a strut and skip from the Marais, the chef brings her Pinoy party staples to a permanent space. The fried chicken applauded at her popups is on the menu, as well as desserts like strawberry pandan pavlova. Occasionally, she’ll host a boodle fight night.
There’s a lot to savor in this moment, where a Filipino food joint can exist amid Paris’s bistros and boulangeries. Maybe one day, Rue de Montreuil might become a mini Manila the way Rue Saint-Anne is a Little Tokyo of sorts.
For now, the idea of some French tita wandering in and discovering a taste for kare-kare makes me absolutely—‘ow you say? Kilîg.
BETTER CANELÉ THAN NEVER
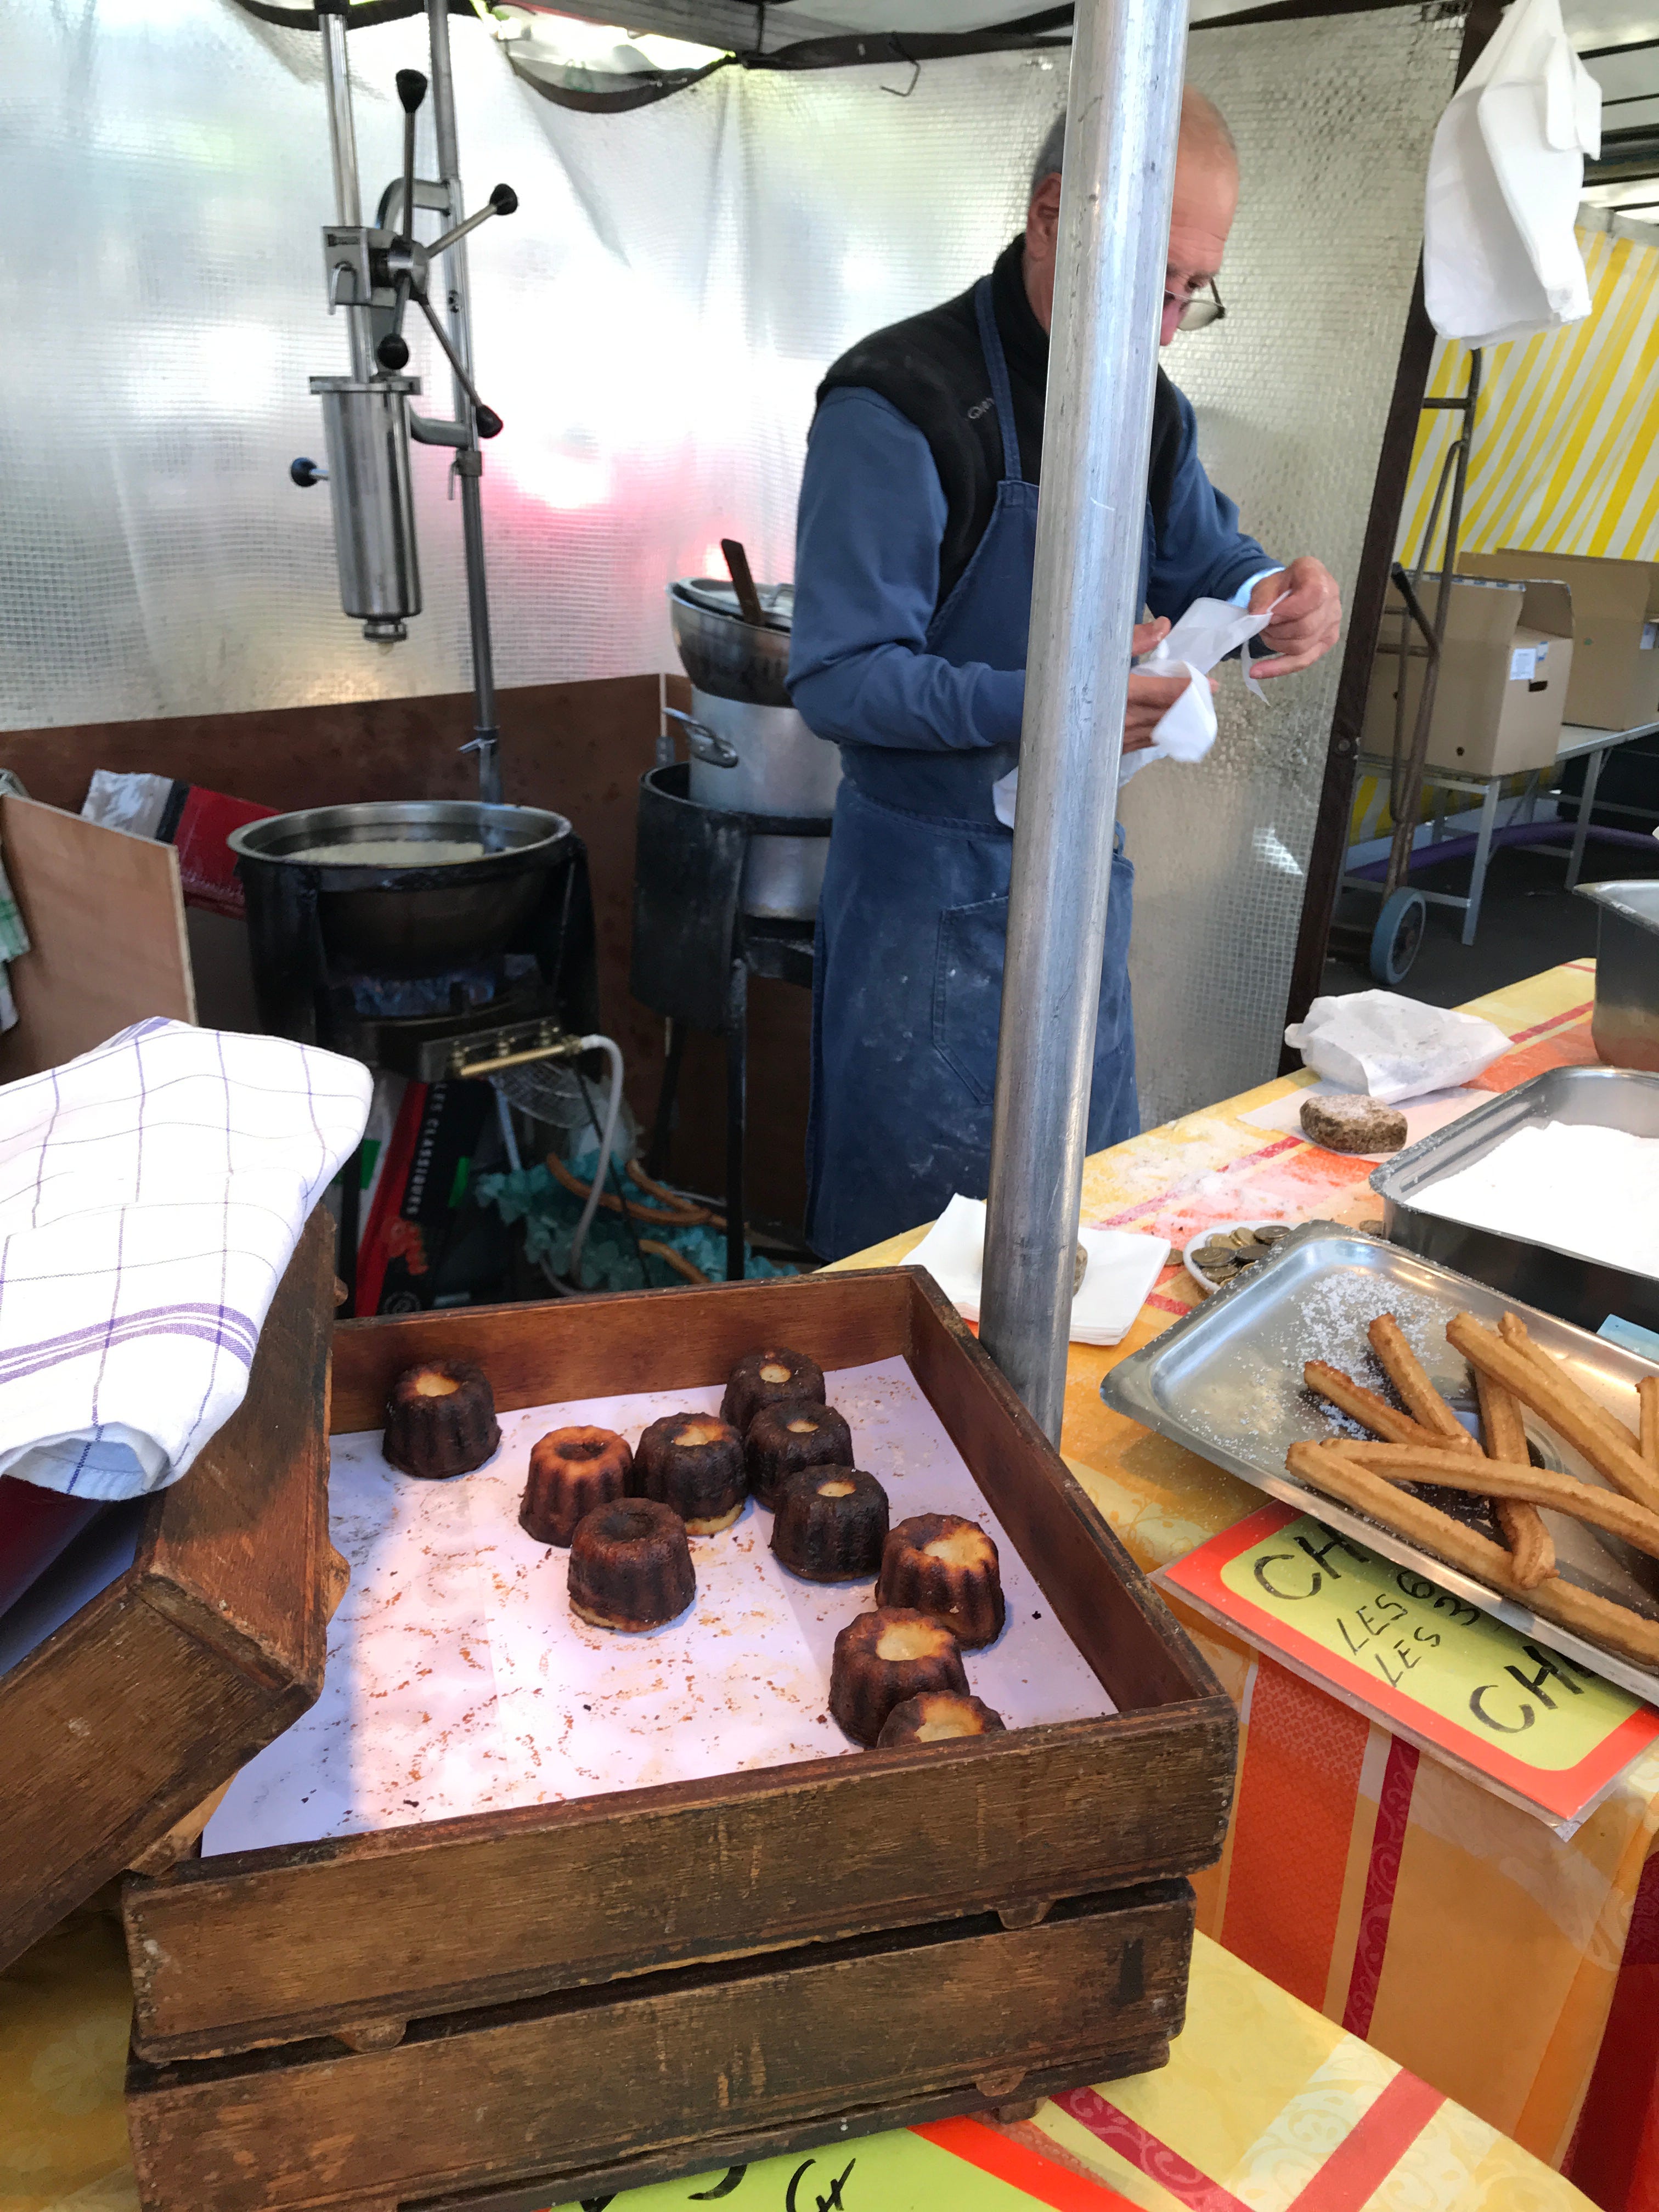
Lately, a workday in post-pandemic(ish) Paris can feel like Mardi Gras weekend. From people ballroom dancing in the street to Marais gays cruising everywhere, COVID testing tent included, everyone seems committed to living their best life before the next virus butts in.
Likewise, I’m not gonna wait to fly back to France to enjoy my favorite French pastries, especially the elusive canelé. Since hardly any Pinoy bakeries make the caramelly, custard-filled treat, I had more reason to find out if I could get my fix at home.
After experimenting with the slightly pricey copper tins I got on Amazon and a mini silicone mold from All About Baking, I discovered that yes, you can make canelé should the spirit move you.
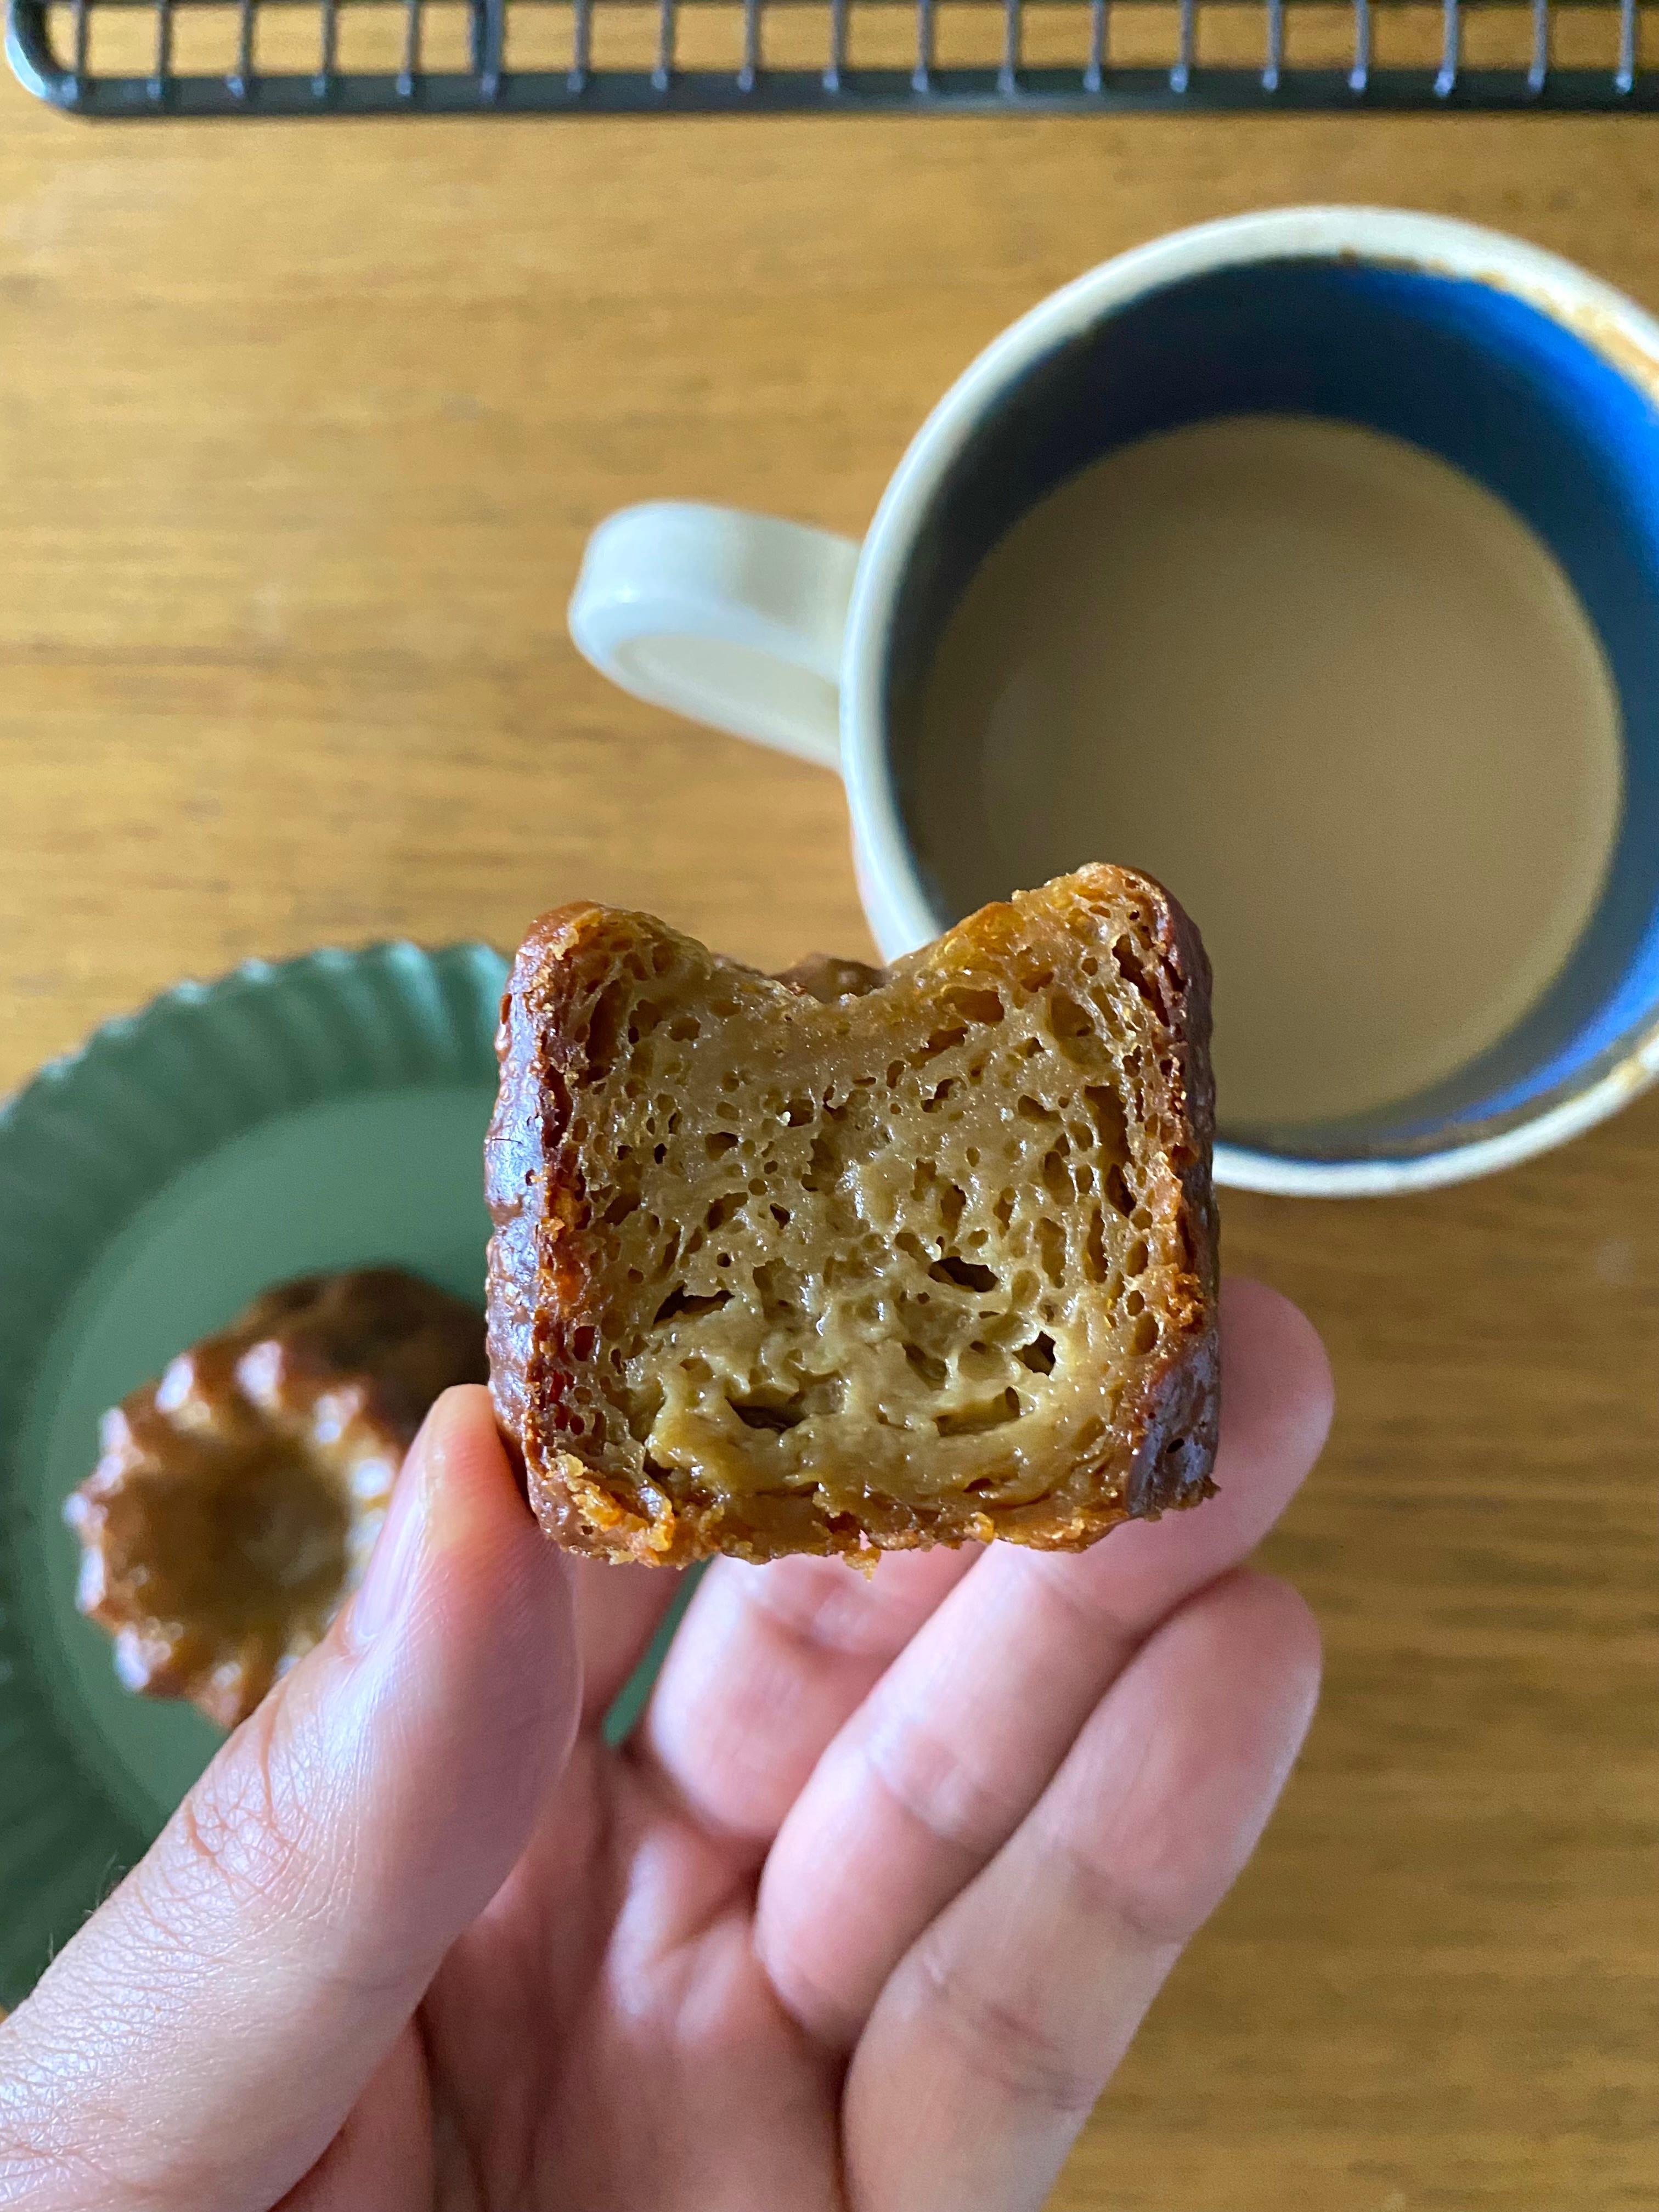
And it should! The batter is a breeze and gives you the freedom to play around with flavors. Since I almost always alternate sips of coffee with bites of canelé, I thought, why not just combine the two?
BAKEWARE
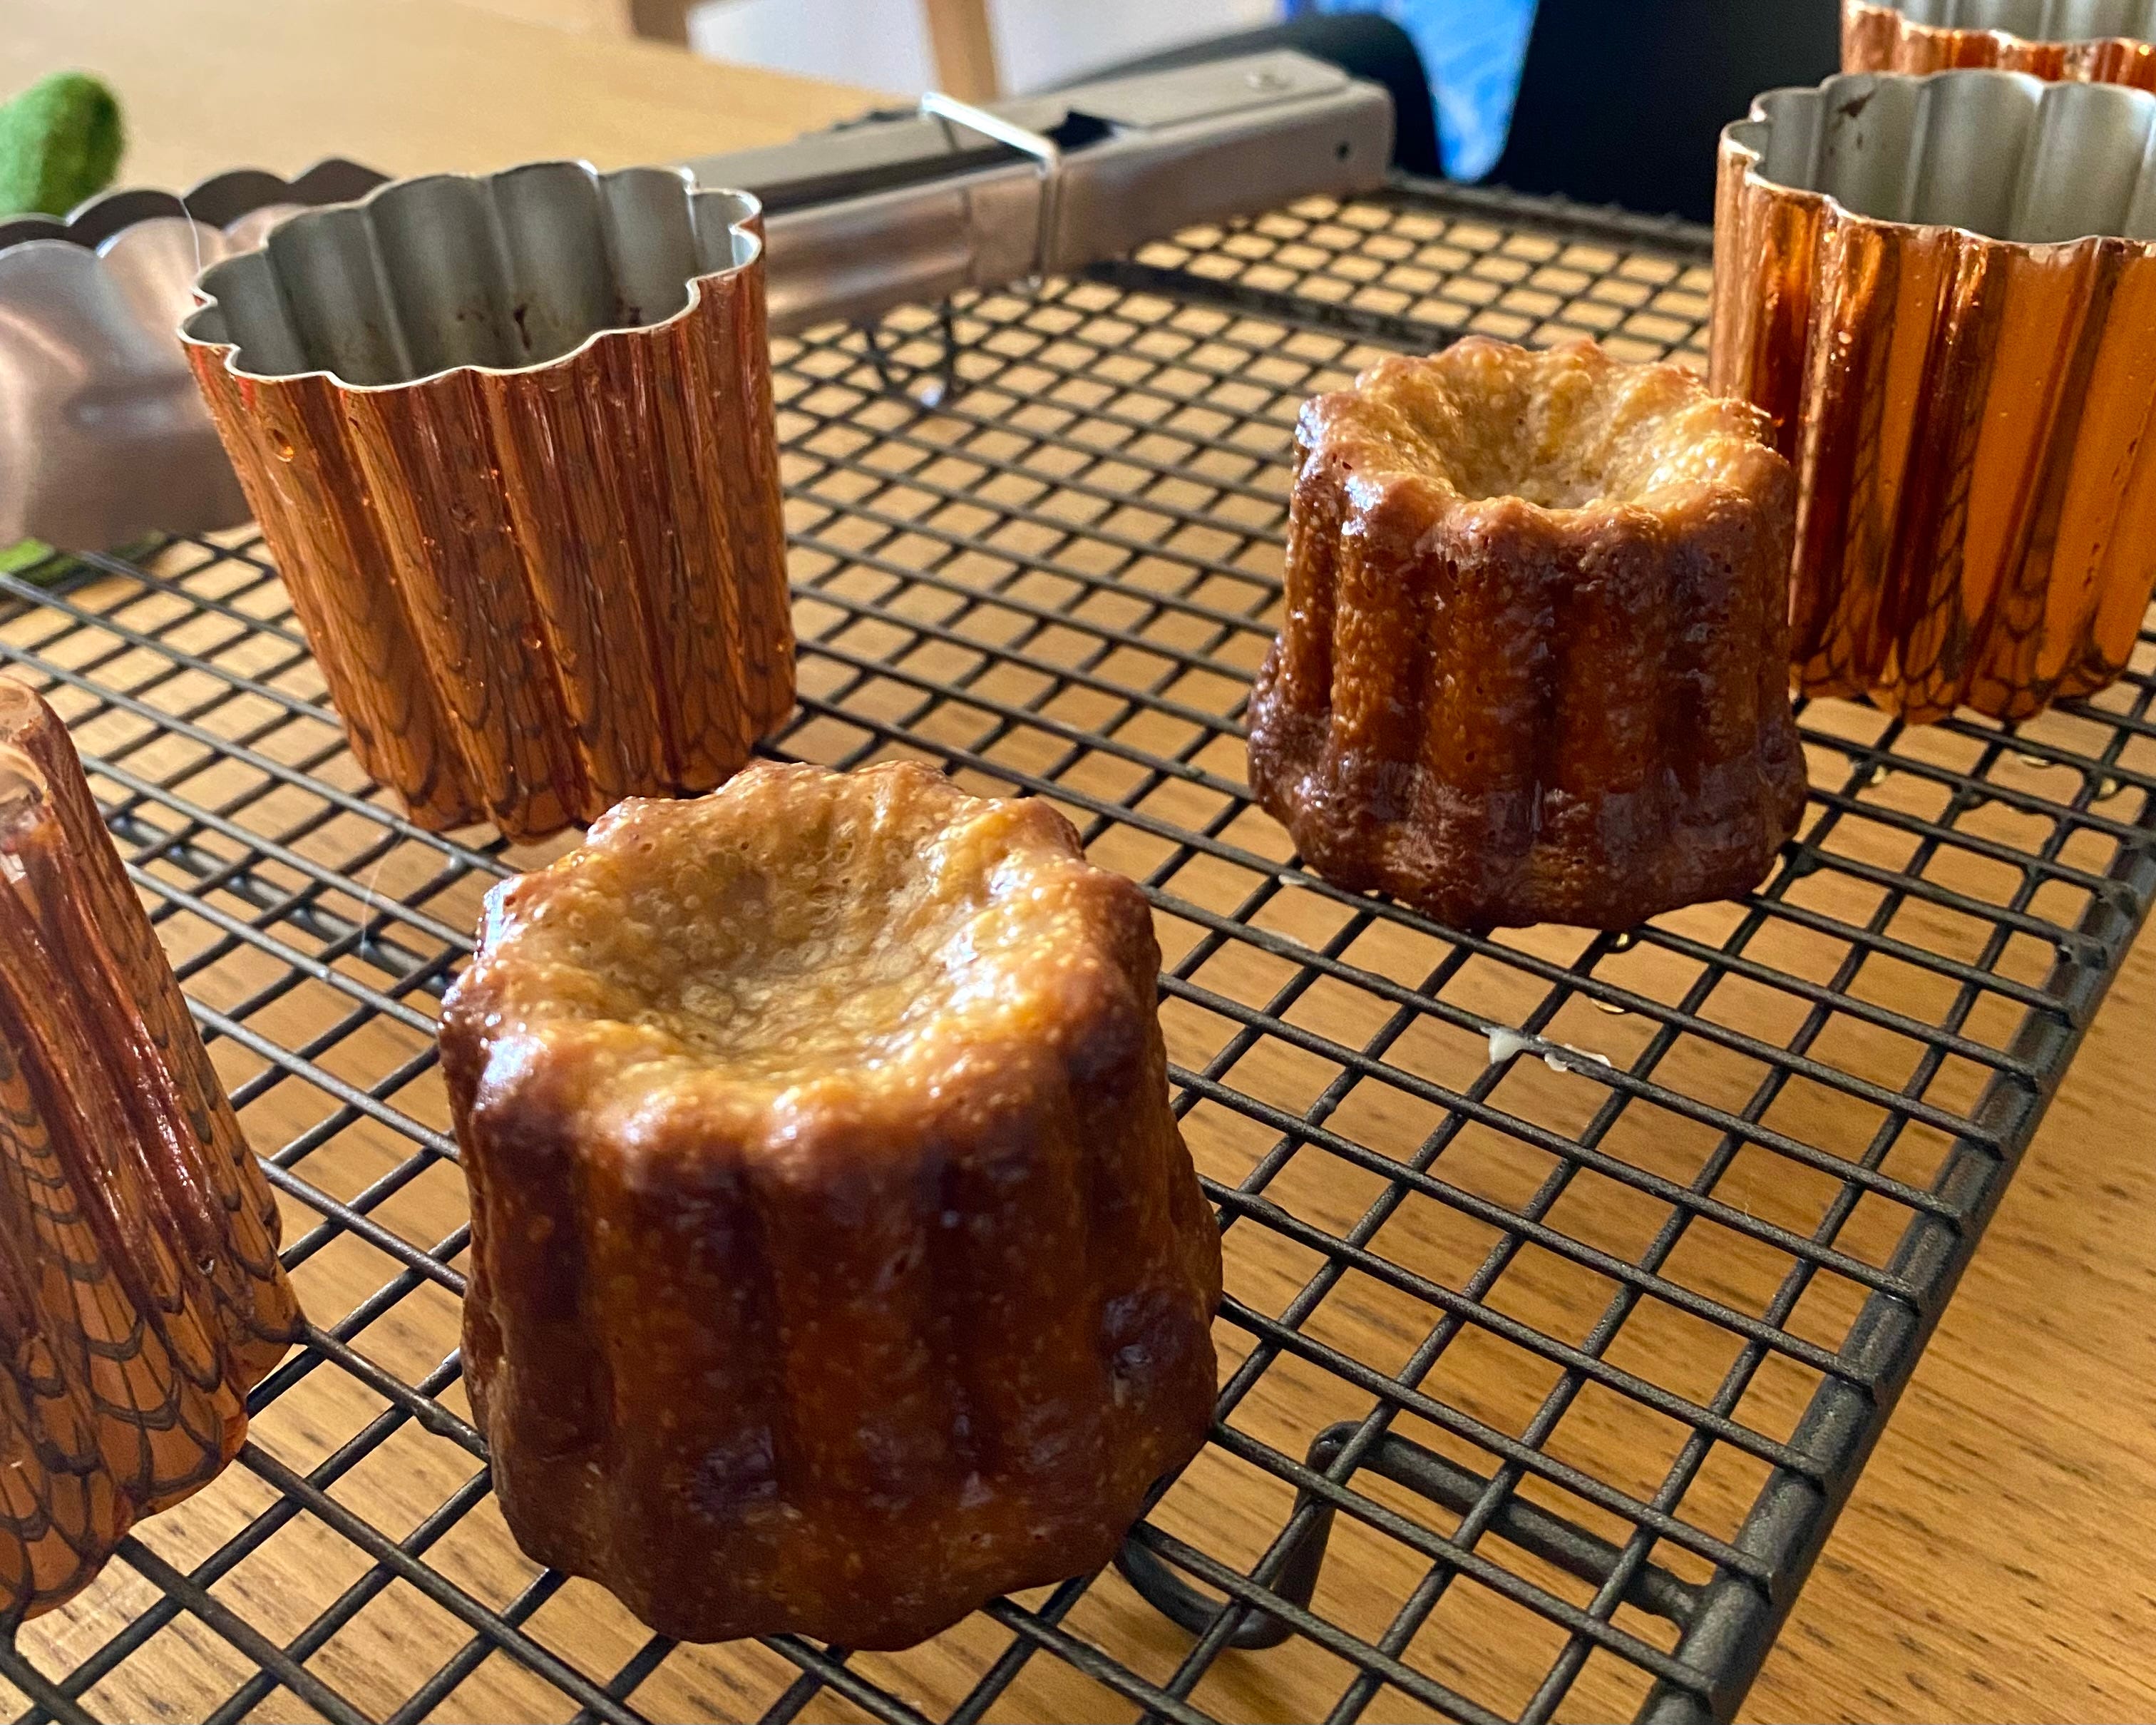
First off, what kind of canelé crust are you going for? A silicone mold will get you a crisped shell with a fair amount of bronzing, no doubt. And if you’re not pious about canelé in its classic fluted shape, you can even use a muffin tin.
But if you’re aiming for canelé as shellacked and burnished-brown as Shawn Mendes’s beach hair, you’d best spring for a traditional copper tin and the beeswax to season it with.
BEESWAX
Food-grade beeswax is available via Lazada. On bake day, simply combine 1:2 of beeswax with unsalted butter in a heat-proof container (For four molds, I grated 50g beeswax and added 100g butter in a mason jar).
Place this container in a water bath—basically, a saucepan containing about half an inch of water. Then, get that water to a simmer, thereby warming the mix.
Once it’s completely melted, pour the still-hot beeswax-butter mix into one copper mold until just below the rim. Quickly pour it back into your container and invert the mold on a cooling rack. Then, repeat with the next mold until they’re all thinly coated. Note: When I say quickly pour the liquid, I mean as quickly as reproductive rights are slipping from American women’s fingers—so do that with absolute haste!
I found that beeswax-coated copper molds yielded canelé with the crackle, snap, and gummy give that I obsessed over when I first had them. So, choices!
BATTER
Just as getting enough shuteye keeps my mood stable, a good amount of rest levels out the rise of your batter. A same-day batter works. But chill it for 48 hours for fully realized flavor, not to mention an even-tempered rise in the oven. Less chance of it surging, collapsing, and dimpling into itself.
For best results, mess with your batter less. Whisk it just until combined, and gently once again before pouring into your molds. Similar to Bjork exiting an airport, it doesn’t seem to respond as favorably when perturbed.
COFFEE CANELÉ
INGREDIENTS
(Makes 4 Regular Canelé)
26g Unsalted Butter
243g Full-Cream Milk
1.5 Tsp Espresso Powder
50g All-Purpose Flour
100g Granulated Sugar
1 Egg
1 Egg Yolk
20g Coffee Liqueur
Pinch of Fine Sea Salt
*For a classic custard, simply replace the espresso powder with ½ a vanilla bean scraped in or a tsp of vanilla extract, then replace the coffee liqueur with 25g of rum. But feel free to experiment! Try calvados, even.
Combine butter, milk, and espresso powder in a saucepan. Bring to a simmer, then remove from heat and let steep for 10 minutes.
Add your flour to a separate bowl mixed with a pinch of salt.
In yet another bowl, gently whisk your eggs just until combined. While whisking, pour a bit of your fully steeped milk mix into the eggs to temper. Then, add the milk mix bit by bit until fully incorporated. Now, stir in your coffee liqueur, rum, or any similarly dark spirit you have on hand.
Mix the liquid with your dry ingredients, whisking just until combined. Lastly, pour everything through a sieve and into a container you can chill, then cover it in plastic wrap. Note: If the mix is still hot, cool the container by placing it in an ice bath.
Once you’re ready to bake, preheat your oven at 500F for at least an hour. While it heats, season your molds as described earlier.
Remove the fully rested batter from the fridge and place your molds in the freezer for 15 minutes.
Fill your molds until about ¼ inch below the rim. Even better, use a weighing scale and portion each pour at 60g per mold.
Bake for 10 minutes, then lower your heat to 375F and bake for 45 to 50 minutes or until it’s the color of Tim Tam all around. Note: At some point, your batter could rise past the rims but do not freak out. Towards the end of your baking, it’ll calm its tits eventually.
Immediately unmold your canelé on a cooling rack. It’ll be soft like a cushion but will stiffen up at room temp. If it’s looking paler than you prefer, feel free to pop it back into the oven minus the mold for five to 10 minutes.
SILICONE MOLD NOTES
Using a silicone mold? To prepare your mold, you merely need to brush it lightly with melted butter before filling.
Preheat your oven to 450F and bake for 20 minutes, then lower the heat to 400F and bake for another 15 to 20 minutes, or until the bottoms are the shade of Donatella Versace on some Greek beach in 2010.
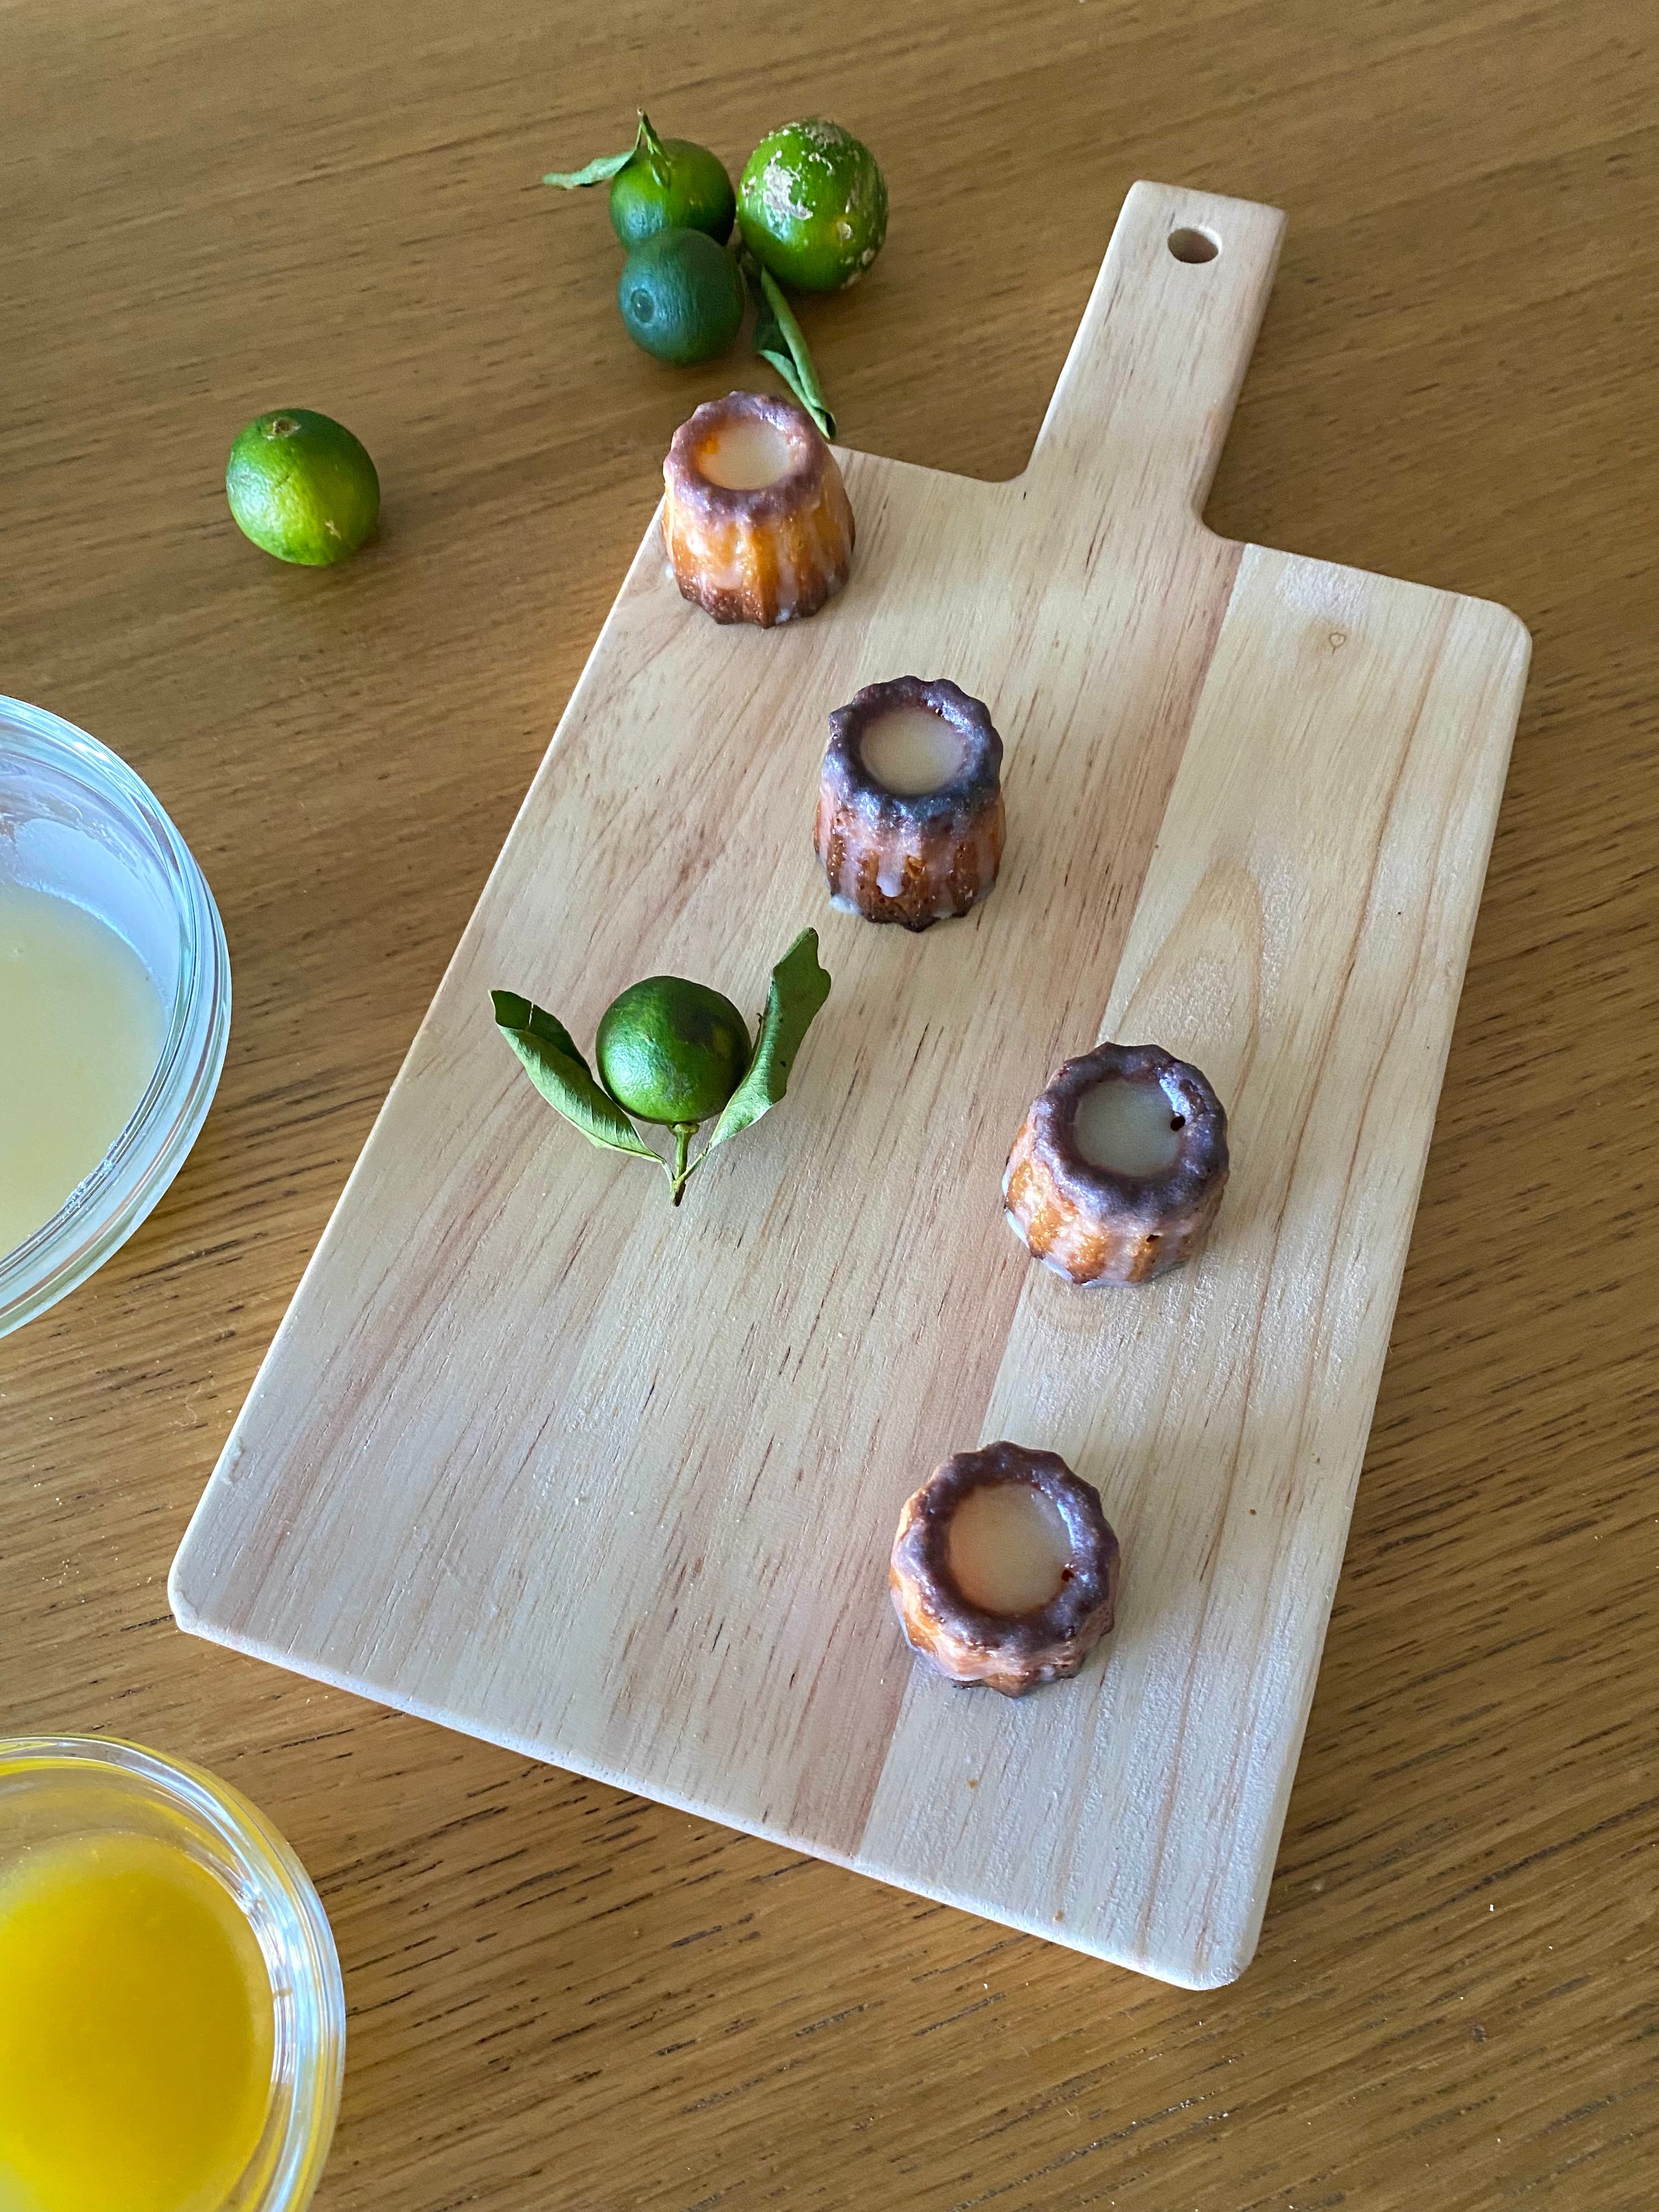
CALAMANSI-GLAZED CANELÉ
If you decided on a classic canelé, why not add a citrusy glaze to perk it up? My mother had a bounty of calamansi from her farm so I whisked 30g of juice and 135g of icing sugar until thick, then dipped the top of each mini canelé into the mix. That glaze will pool on top and trickle beautifully down the edges—a thing of pride! Now grab that canelé and sashay away.
*IMPORTANT NOTE for SILICONE BAKERS: after the baking times recommended above, you'll want to pop the canelé out of their molds, set them upright on a baking sheet, and return them to the oven to bake for an extra 5 to 10 minutes. This bronzes the upper halves up a little more and crisps up the crust.
*YET MORE CRUCIAL: do not forget to add your sugar to the rest of your dry ingredients (flour, salt).
For some cracked-out reason, I skipped including this in the instructions. A lesson that I need to check my recipe copy like it's my last will and testament before peacing out on my death bed.